Creating Character Rigs

CBOX makes creating character rigs quick and easy.

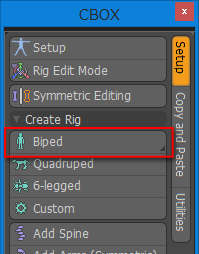
  1. Click [Biped] in CBOX's Main Palette.
    If you don't want to use a human shape or one of the other presets to create your rig, click [Custom] instead. Rig items for the minimum configuration (RootItem and Hub item) will be generated.
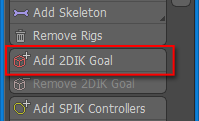
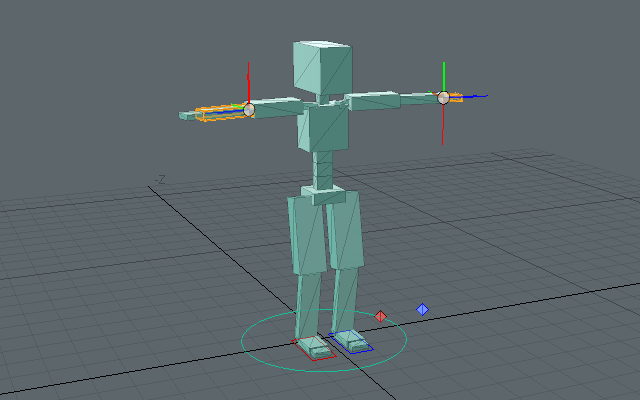
  2. Select rig items and add rig functionality.
    In this example, we selected skeleton items of the left and right arm rigs and then clicked [Add 2DIK Goal].
    You can add spine rigs, arm rigs, leg rigs, tail rigs, digit rigs and SPIK controllers in the same way. If you add a rig by mistake, click [Remove Rigs] with the mistakenly added rig in the selected state.
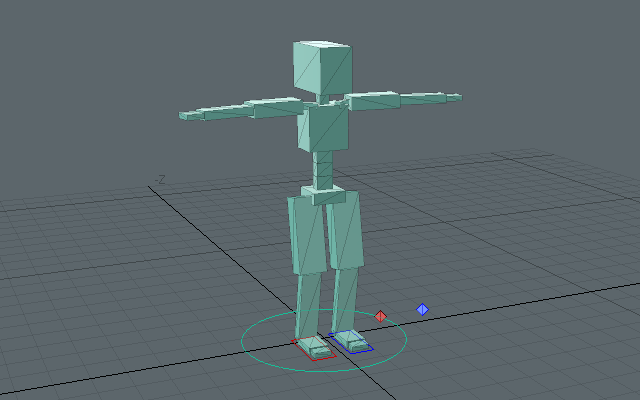
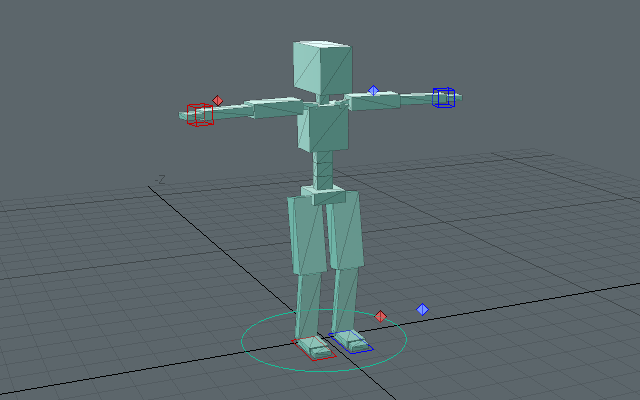
  3. We finished creating our character rig.
    We were able to add 2DIK goals to both arms.
    Next, we will turn on [Rig Edit Mode] and edit the rig's joint positions with the Setup Mode.

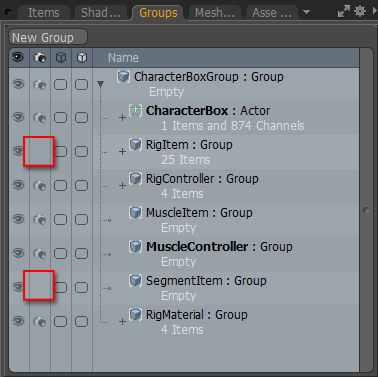
    CBOX adds a group called "CharacterBoxGroup" when creating a rig.
    It adds the materials "RigItem" and "SegmentItem" to the shader tree. Edit these materials when you wish to change the color of a skeleton.
    Skeleton items are set to not render by default. If you wish to render skeletons, set [Render] to ON for the groups "RigItem" and "SegmentItem" in the group viewport.

Tutorials

About CharacterBox

Videos

PSOFT CharacterBox
PSOFT YouTube Channel

  1. Introduction to the "CharacterBox" MODO Plugin (Live video broadcast March 3, 2017. In Japanese.)
  2. Character Rig Creation
  3. Rig Functionality
  4. Copy and Paste
  5. Muscles
  6. Weight Meshes
  7. Combination With MODO's Standard Functionality
  8. Exporting to FBX Format
  9. New product sneak preview
  10. Symmentry Items Selection
  11. Soft IK Strength
  12. Sync To Goal Rotation
  13. Support for Scaling Rigs
  14. Mirror Weight Tool
  15. Symmetric Editing Tool
  16. New Standalone icense Tool
  17. Muscles Support Locators
  18. Copy Skelton Size
  19. Symmetry Tags
  20. Relocate SPIK Controllers
  21. Support for Action Layers

CharacterBox Tutorials
Creator: Artist - Matt Meersbergen

  1. Biped Rigging Introduction
  2. Biped Rigging Introduction
  3. Character Mesh Prep
  4. Hips, Leg and Feet IK/FK setup
  5. Spine, Arms and Fingers setup
  6. Episode 6 Face Rig
  7. Episode 7 Binding Mesh
  8. Eye Controls
  9. Actors, Actions, Poses explained
  10. Snake - Basic Rig setup
  11. Speed Test
Modo and Character Box and Cloud rendering