Pencil+ 4 for Maya :
General
-
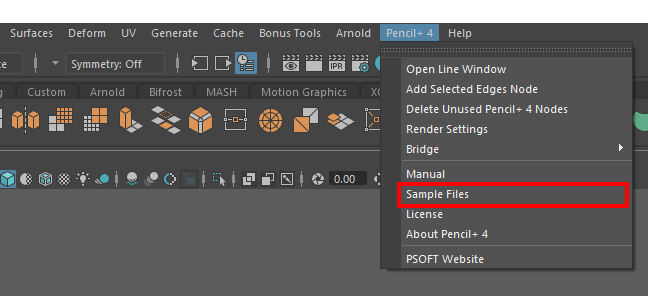
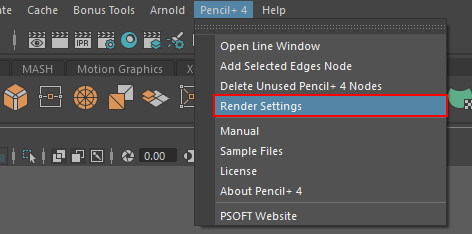
Please click [Sample Files] under [Pencil+ 4] in the Maya menu.
 Last updated 2019/08/27 Article Link
 -
Please use a [Size Map].
[Stroke Size Reduction] uses screen space as the basis for computing lines. Because of this, depending on the curve settings, lines can look unstable when animating. [Size Map] uses the object's UV coordinates to specify line thickness, so stable lines can be drawn when animating.
Please have a look at the [Size Map] sample file "LineSizeMap_1.mb" installed with the plugin.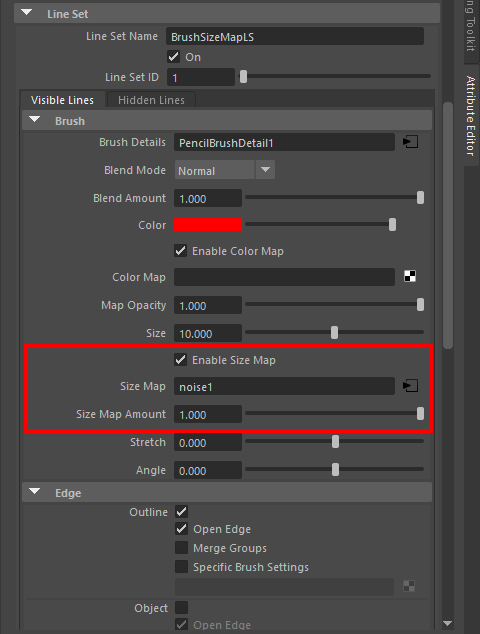
 Last updated 2019/08/27 Article Link
 -
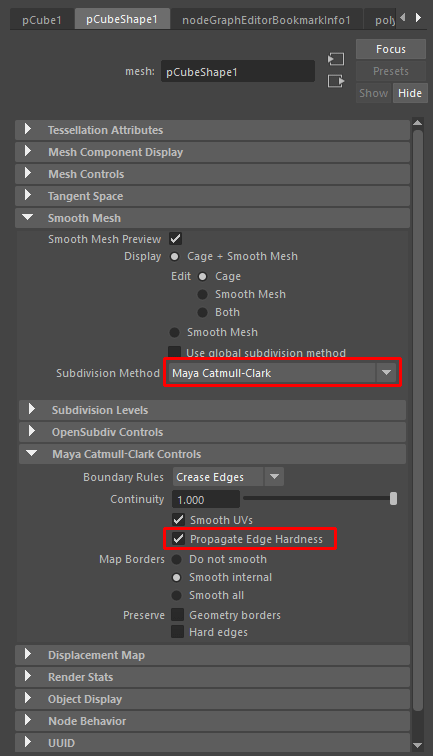
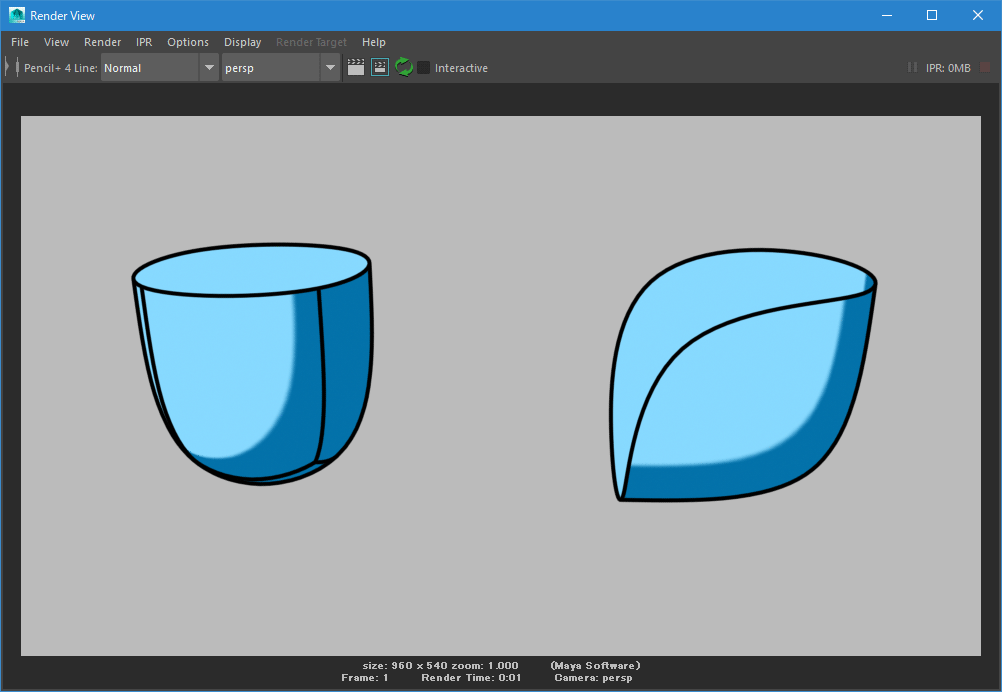
To reproduce, using Maya, the drawing of lines using the [Crease] functionality of 3ds Max, use [Hard Edges] and [Maya Catmull-Clark]'s [Propagate Edge Hardness].
Furthermore, the Pencil+ 4 sample file "MeshSmoothPreviewRender.mb" uses [Hard Edges] and [Propagate Edge Hardness] to draw lines. Please refer to the settings of the object on the left-hand side.
 Last updated 2018/12/19 Article Link
 -
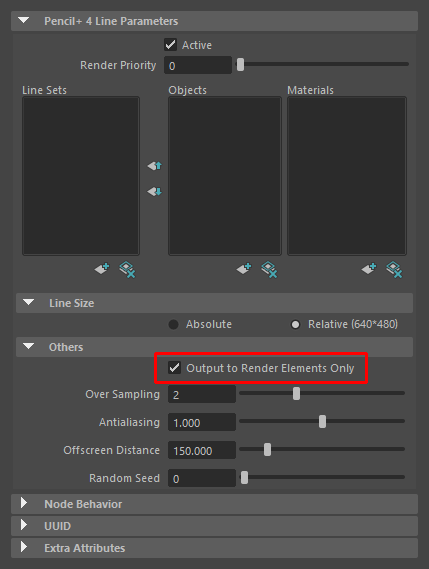
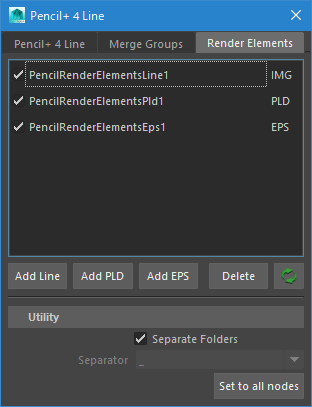
To output materials and lines separately as images in one render, enable [Output to Render Elements Only] in the PencilLine node, add Render Elements nodes and render the scene.
 Last updated 2018/12/19 Article Link
 -
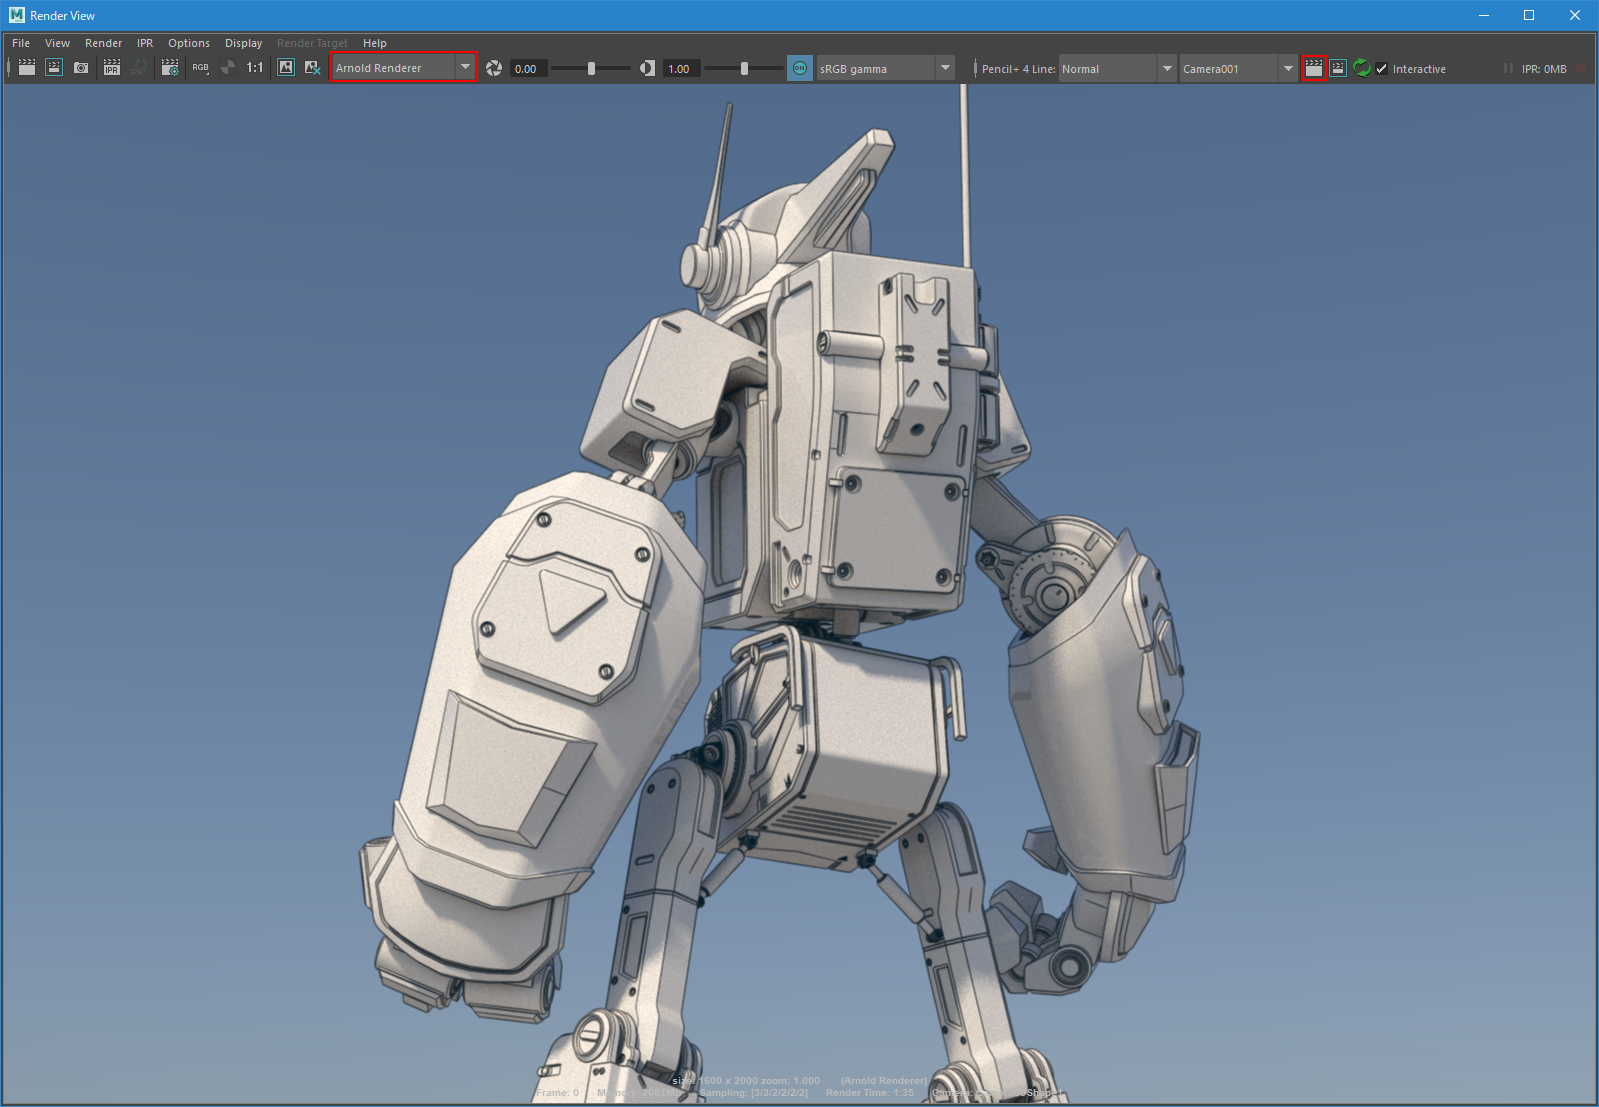
Pencil+ 4 uses the Maya Software Renderer. You can use the Pencil+ 4 Line render buttons added to the render view to overlay Pencil+ 4 Lines over images rendered with mental ray or Arnold.
 Last updated 2019/04/11 Article Link
 -
Pencil+ 4 supports rendering smooth mesh previews. Enable it in the "Rendering Settings" under the Pencil+ 4 menu.
 Last updated 2019/05/10 Article Link
 -
If you wish to fix noise-like slight changes in the colors when rendering PencilMaterial, please open Maya's [Render Settings], go to the [Maya Software] tab and uncheck [Jitter final color].
 Last updated 2019/11/18 Article Link
 -
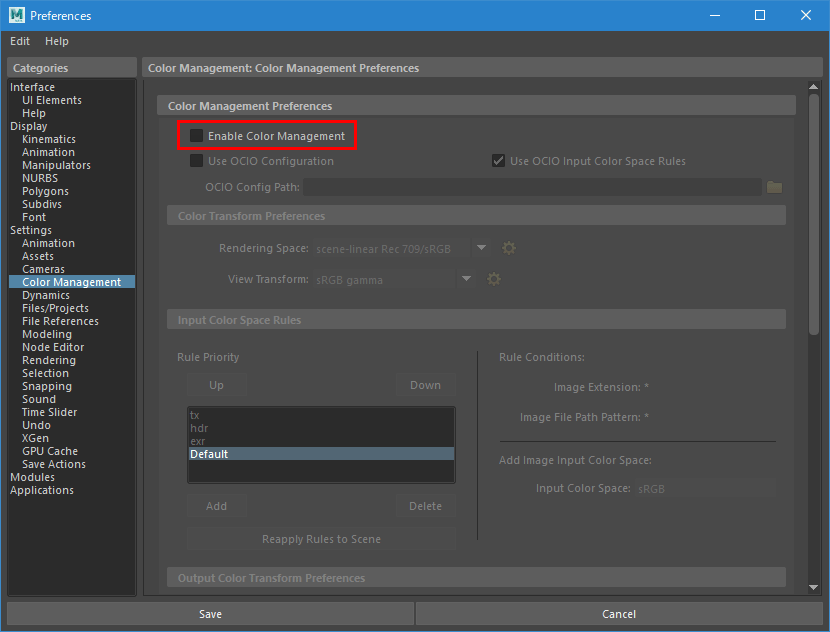
Please disable the render view's [View Transform]. Also, please uncheck [Enable Color Management] in Maya's Preferences.
The Maya software renderer does not handle [Color Management]. This is why the colors of images displayed in the render view and those in saved image files are different when [View Transform] and [Enable Color Management] are ON.

 Last updated 2019/11/18 Article Link
Installation
Licenses
Network Settings
-
Pencil+ 4 for 3ds MaxPencil+ 4 for MayaPencil+ 4 Render AppCharacterBoxanti-aliasing for AECelFXCelMXComicStyleLiquid+Pencil+ 3Network Setting
When communicating with PSOFT Network License Manager installed on a server PC, communication may be blocked by [Windows Defender Firewall], resulting in license authentication failure. We introduce how to allow communication on specific ports in [Windows Defender Firewall].
1. How to open a port
- Click the Windows [Start] button on the server PC (the PC on which PSOFT Network License Manager is installed) and then click [Control Panel] from [Windows System Tools].
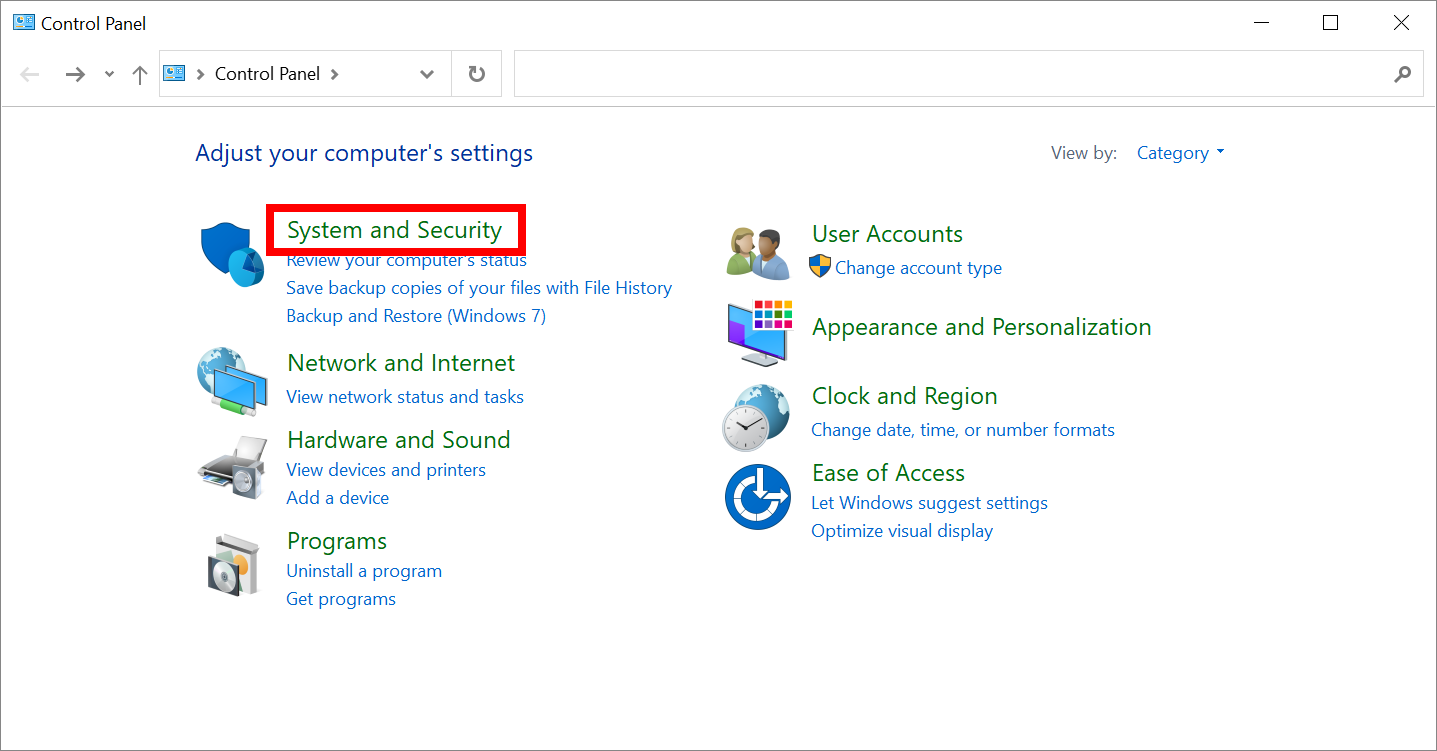
*For Windows 7, click the Windows [Start] button and then click [Control Panel]. - Click [System and Security] on the [Control Panel] screen.
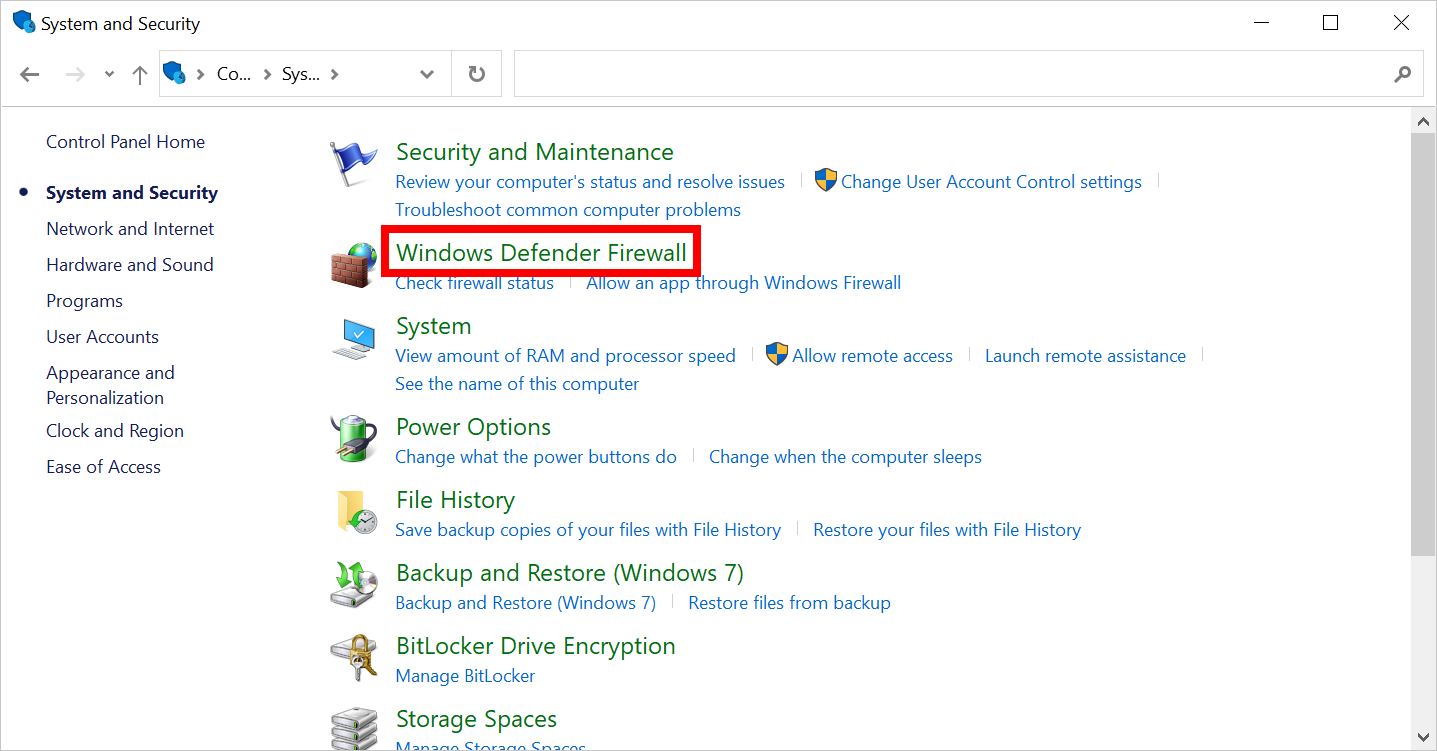
- Click [Windows Defender Firewall] on the [System and Security] screen.
*For Windows 7, the name of [Windows Defender Firewall] is [Windows Firewall].
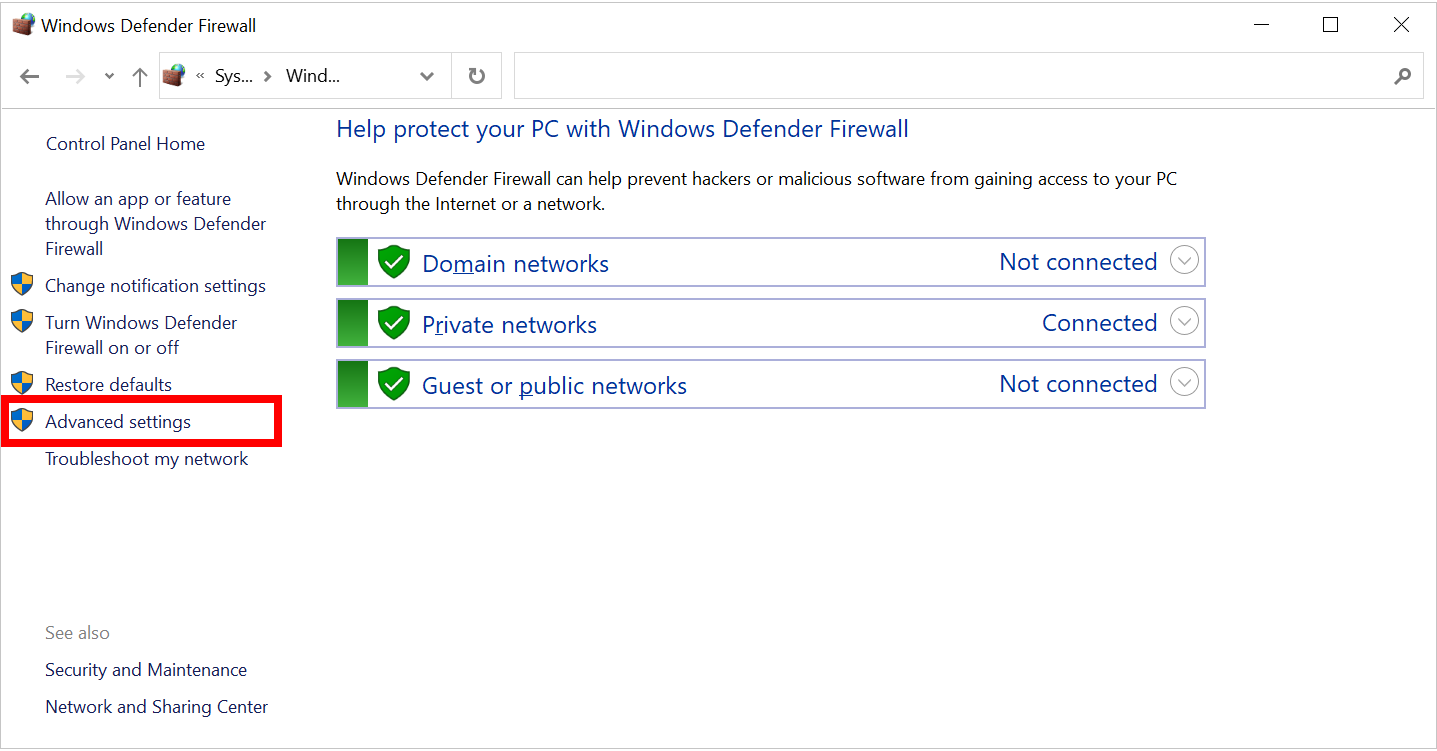
- Click [Advanced settings] on the [Windows Defender Firewall] screen.
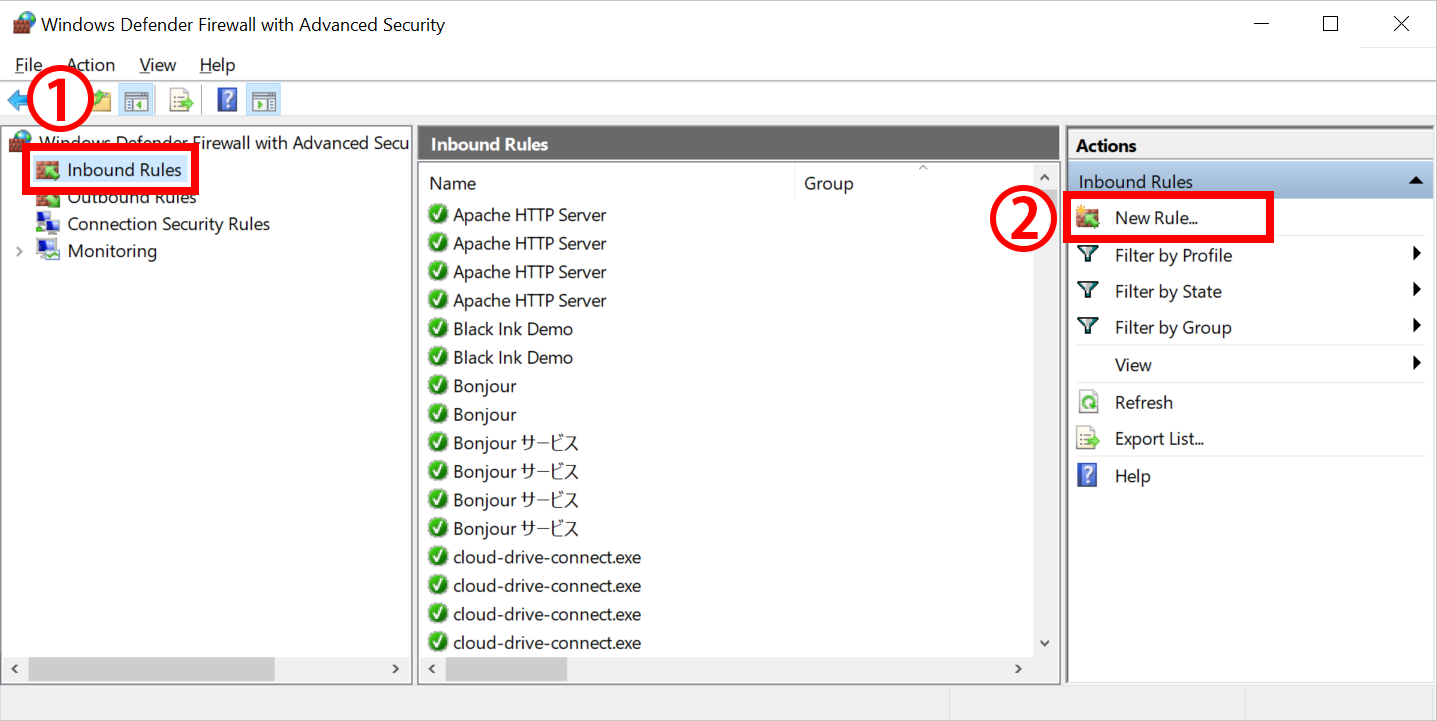
- Click [Inbound Rules] on the left side of the [Windows Defender Firewall with Advanced Security] screen, and then click [New Rule...] on the right side.
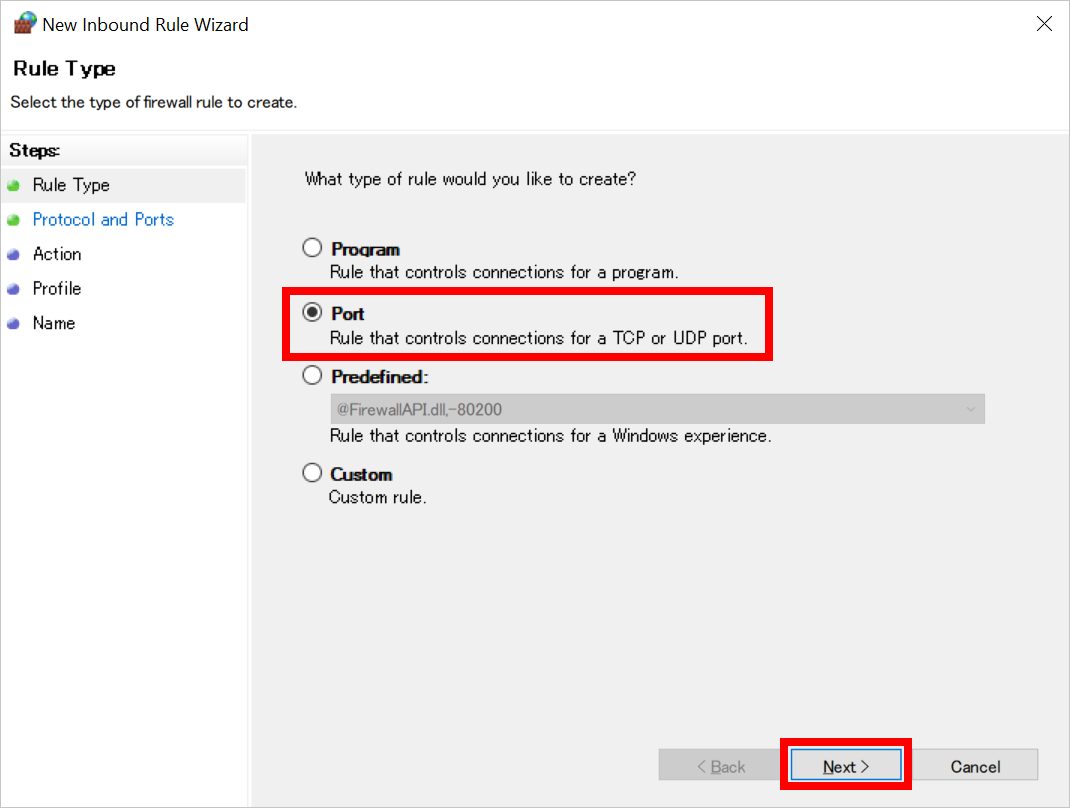
- Select [Port] on the [New Inbound Rule Wizard] screen and click the [Next] button.
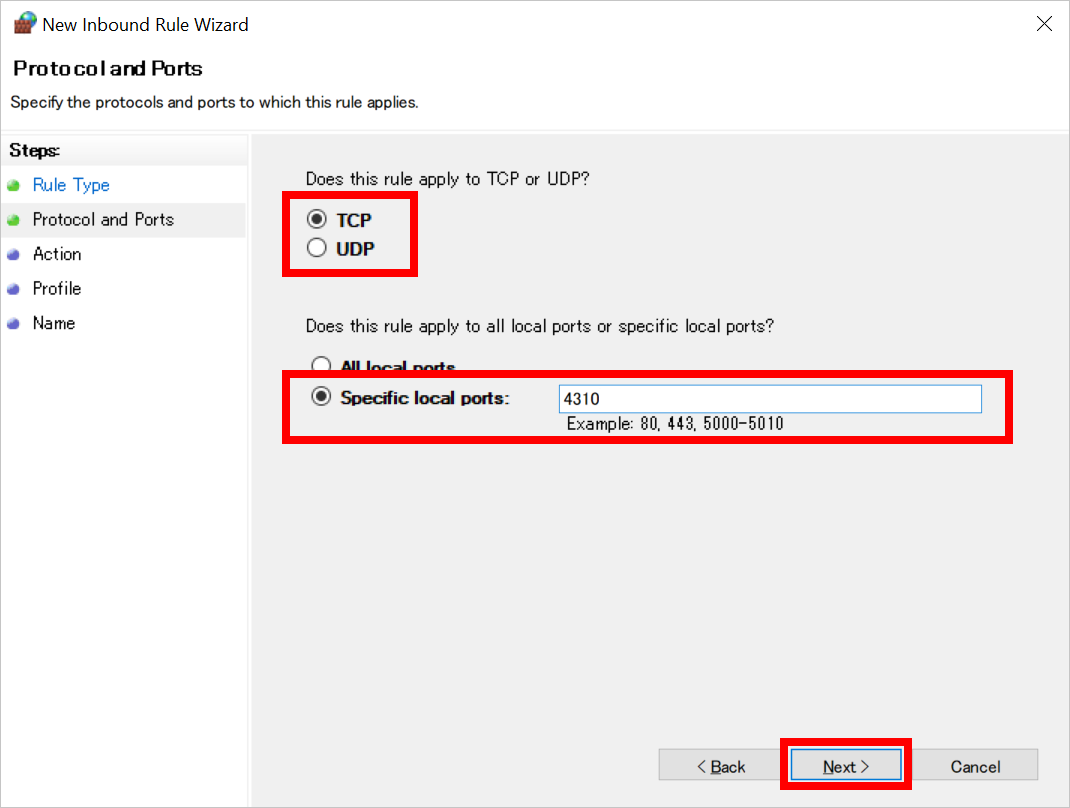
- Select [TCP], select [Specific local ports], enter the port number used by PSOFT Network License Manager and click the [Next] button.
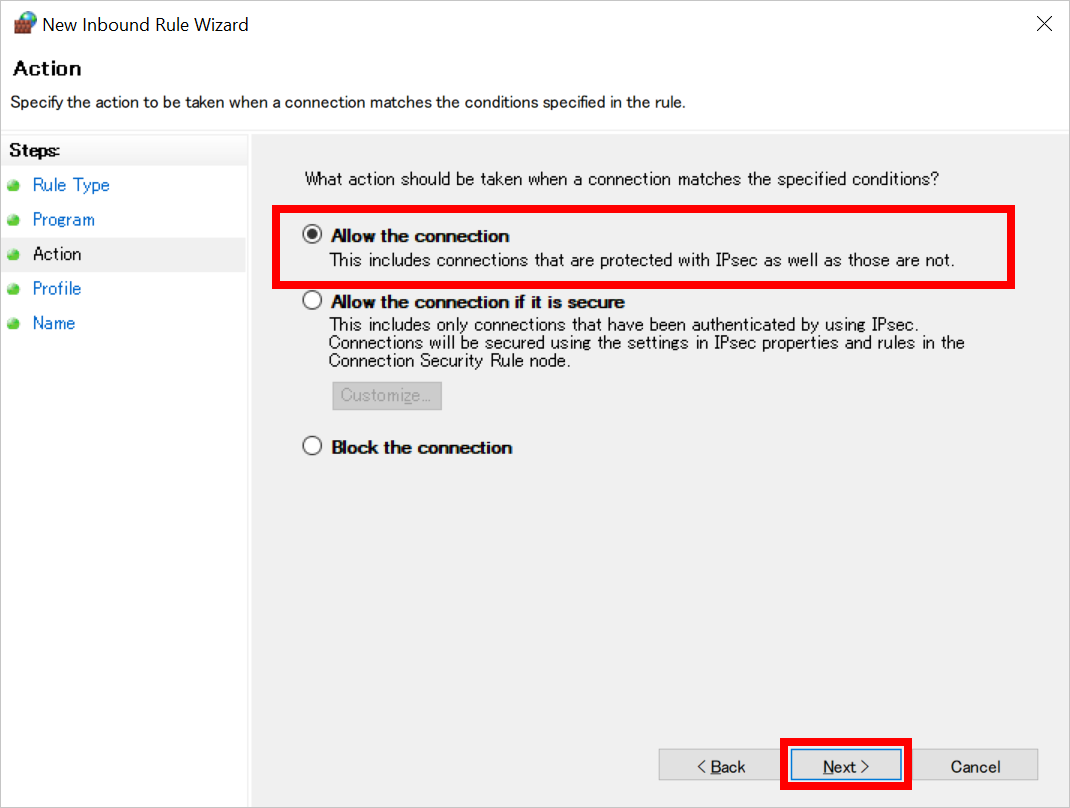
- Select [Allow the connection] and click the [Next] button.
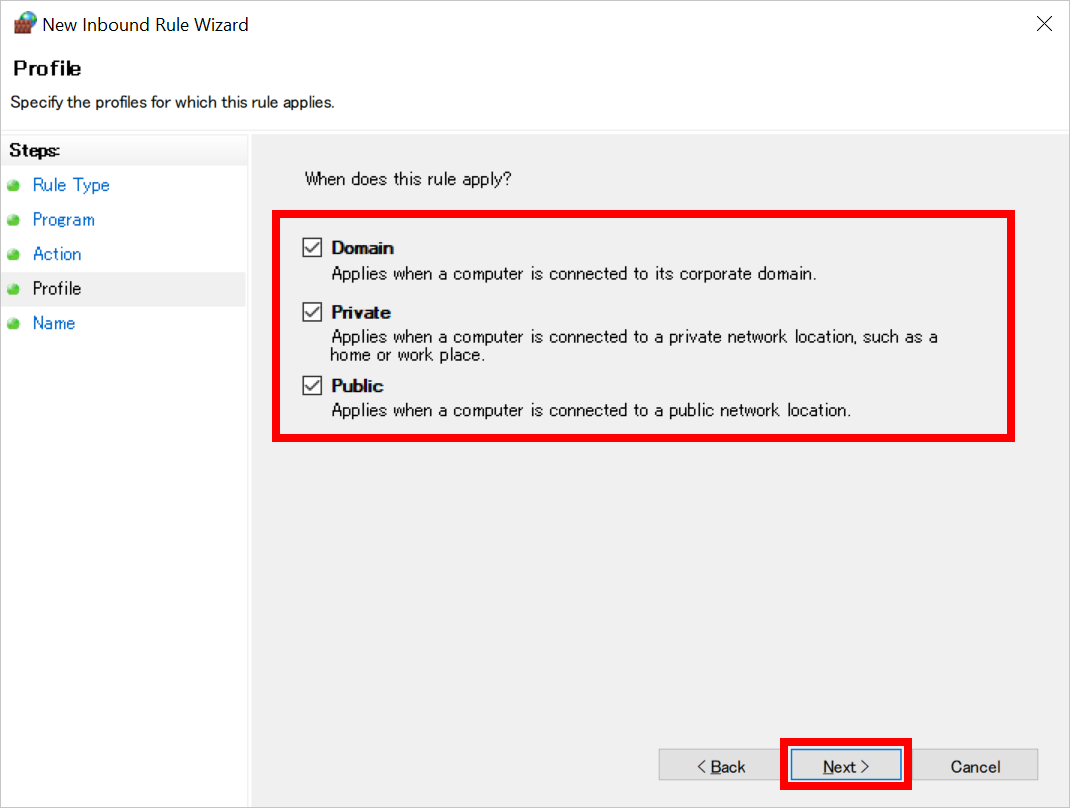
- Select the item(s) matching your network configuration for [When does this rule apply?] and click the [Next] button.
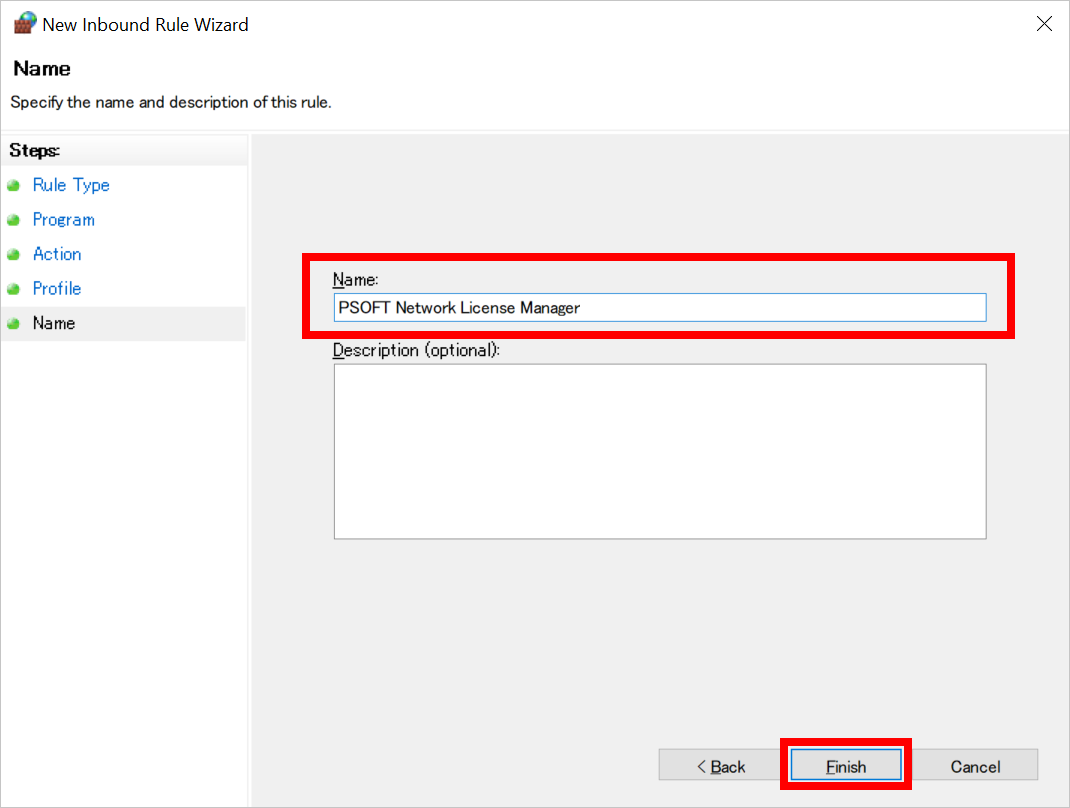
- Enter a name for the rule, such as "PSOFT Network License Manager", and click the [Finish] button.
- Confirm that the rule has been added to the [Inbound Rules] list on the [Windows Defender Firewall with Advanced Security] screen.

You have completed the settings to allow communication on specific ports in [Windows Defender Firewall].
Last updated 2023/04/03 Article Link - Click the Windows [Start] button on the server PC (the PC on which PSOFT Network License Manager is installed) and then click [Control Panel] from [Windows System Tools].
-
Pencil+ 4 for 3ds MaxPencil+ 4 for MayaPencil+ 4 Render AppCharacterBoxanti-aliasing for AECelFXCelMXComicStyleLiquid+Pencil+ 3Network Setting
When communicating with PSOFT Network License Manager installed on a server PC, you may fail to authenticate the network license due to the firewall settings of the OS or security software. We introduce the procedure for setting communication permissions for the application in [Windows Defender Firewall].
Allowing application communication in Windows Defender Firewall
The main steps are as follows:
- Program permissions in the firewall
- Connection method and test for obtaining a license
- Troubleshooting
1. Program permissions in the firewall
- Click the Windows [Start] button on the server PC (the PC on which PSOFT Network License Manager is installed) and then click [Control Panel] from [Windows System Tools].
*For Windows 7, click the Windows [Start] button and then click [Control Panel]. - Click [System and Security] on the [Control Panel] screen.
- Click [Windows Defender Firewall] on the [System and Security] screen.
*For Windows 7, the name of [Windows Defender Firewall] is [Windows Firewall].
- Click [Advanced settings] on the [Windows Defender Firewall] screen.
- Click [Inbound Rules] on the left side of the [Windows Defender Firewall with Advanced Security] screen and click [New Rule...] on the right side.
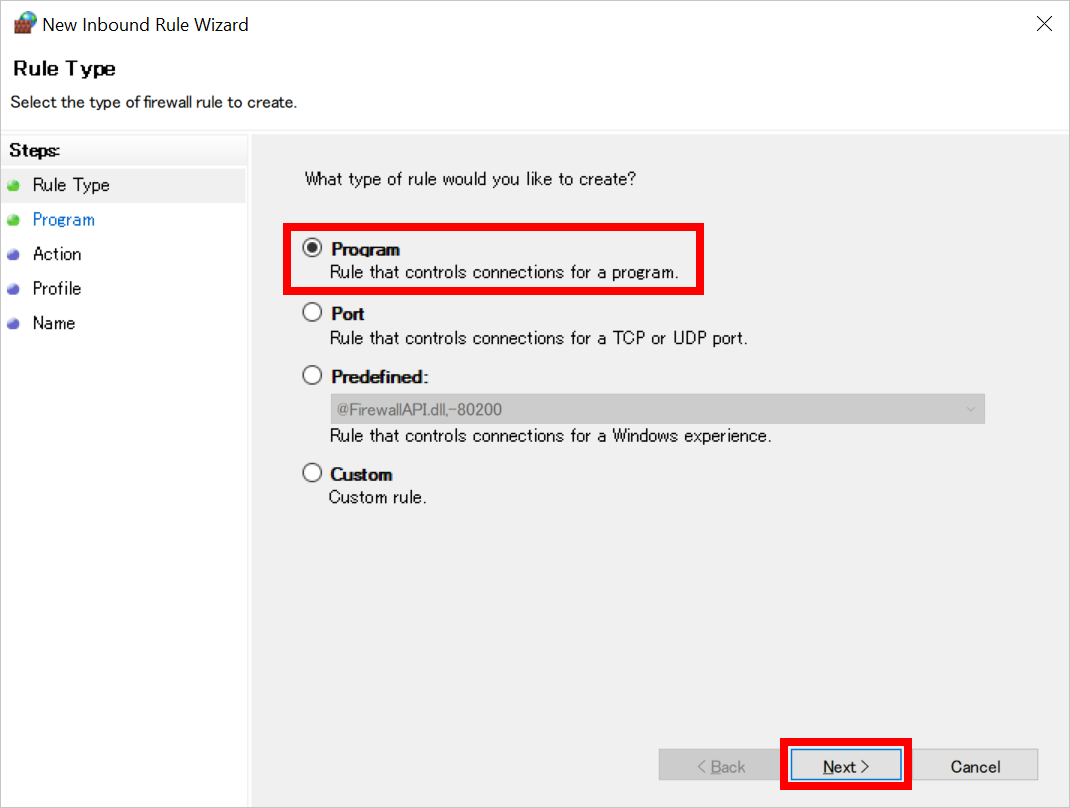
- Select [Program] on the [New Inbound Rule Wizard] screen and click the [Next] button.
- Set the PSOFT Network License Manager program [psoft_nlsvc.exe] under [This program path] and click the [Next] button. PSOFT Network License Manager is installed at the following location.
[Install path on 64-bit OS]
C:\Windows\SysWOW64\psoft_nlsvc.exe
[Install path on 32-bit OS]
C:\Windows\System32\psoft_nlsvc.exe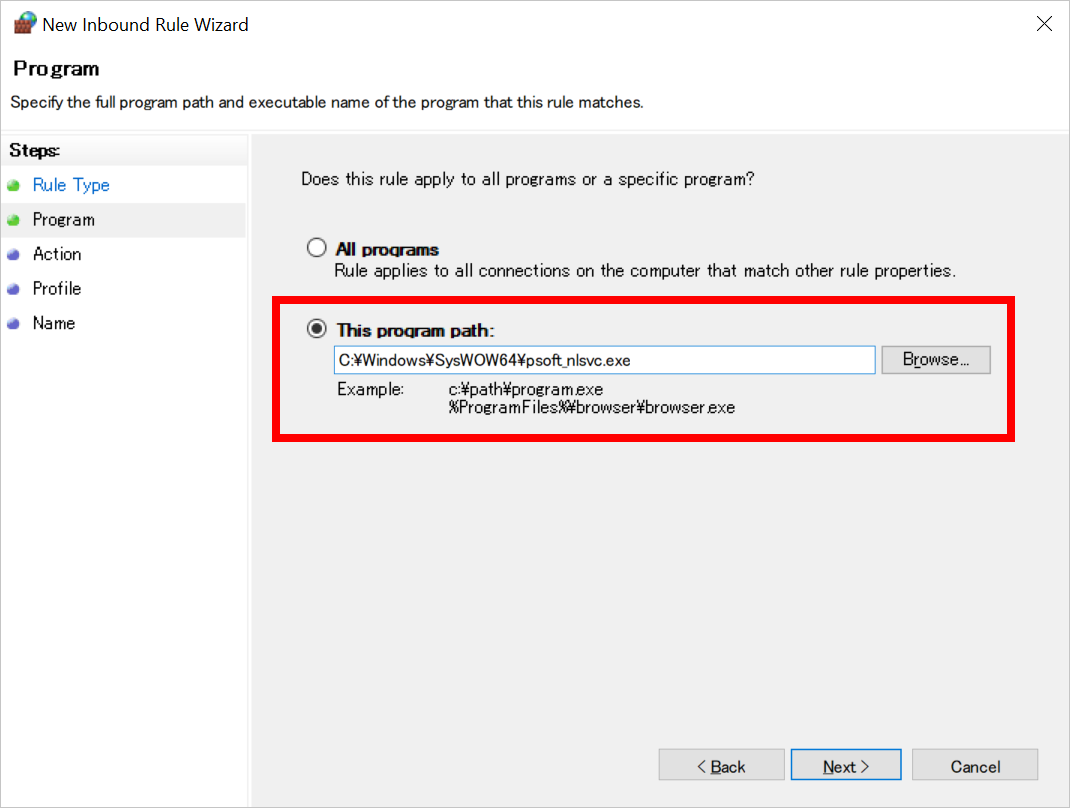
- Select [Allow the connection] and click the [Next] button.
- Select the item(s) matching your network configuration for [When does this rule apply?] and click the [Next] button.
- Enter a name for the rule, such as "PSOFT Network License Manager", and click the [Finish] button.
You have completed the settings to allow communication with PSOFT Network License Manager in Windows Firewall.
2. Connection method and test for obtaining a license
Server PC settings
*Please refer to this PDF file for how to add a license to PSOFT Network License Manager.
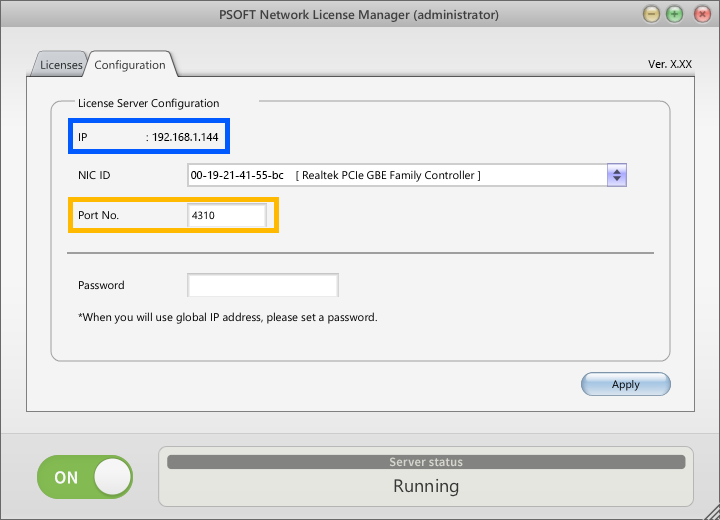
- Start PSOFT Network License Manager on the server PC and set the [Port No.].
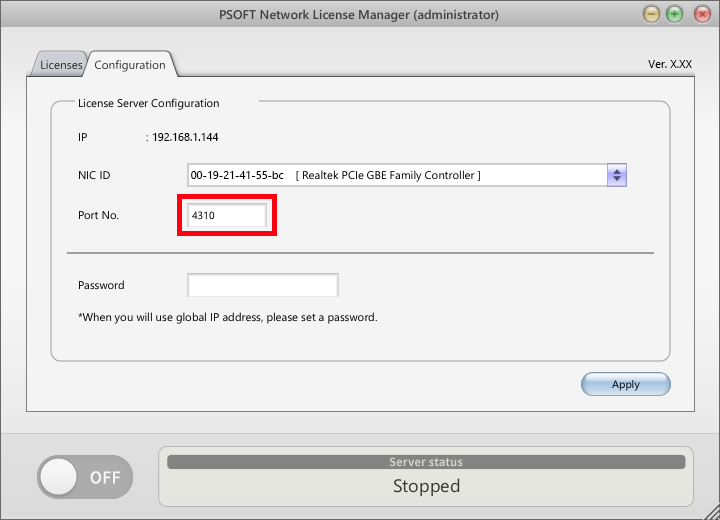
- Click the [Apply] button to apply the settings.
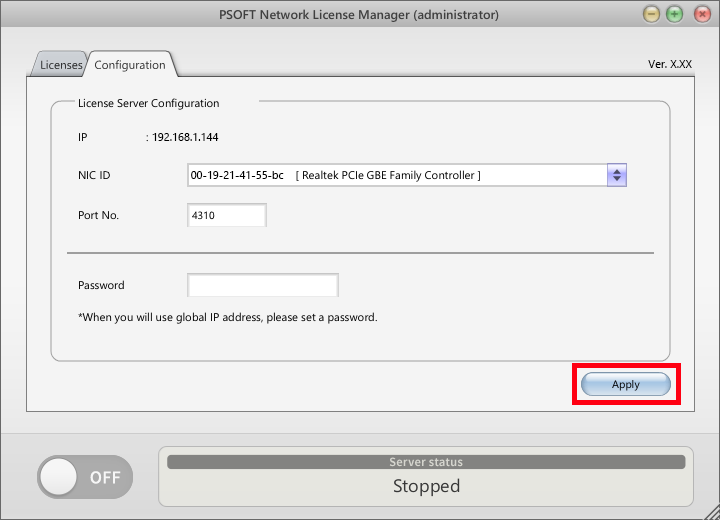
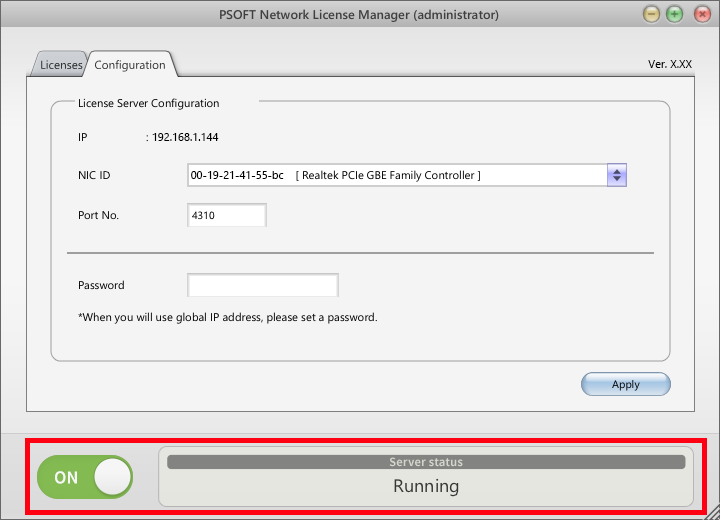
- Press the [On / Off] button to set the [Server status] to [Running].
Client PC settings (for Pencil+ 4)
Applicable products: Pencil+ 4 for 3ds Max, Pencil+ 4 for Maya, Pencil+ 4 Line for After Effects.
- Start [NL Setting Tool].
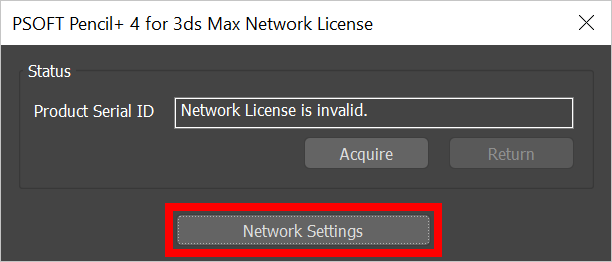
- For 3ds Max and Maya
Click [Pencil+ 4] > [License] in the menu bar, click the [Network Settings] button in the Pencil+ 4 Network License dialog.
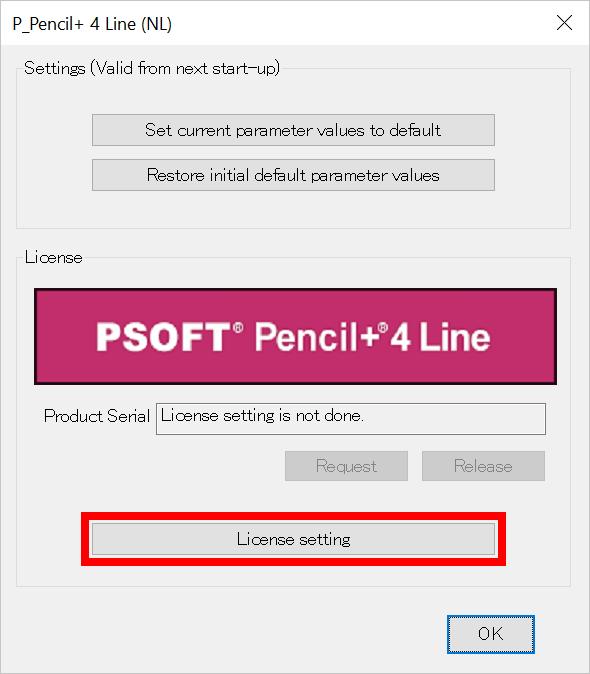
- For After Effects
Click [Options] in the Effect Control Panel and then click [License setting] in the [Options] dialog.
- For Pencil+ 4 Render App
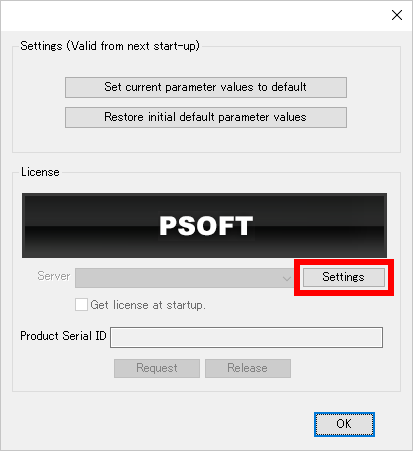
Launch the Pencil+ 4 Render App and click the [Settings] button in the dialog.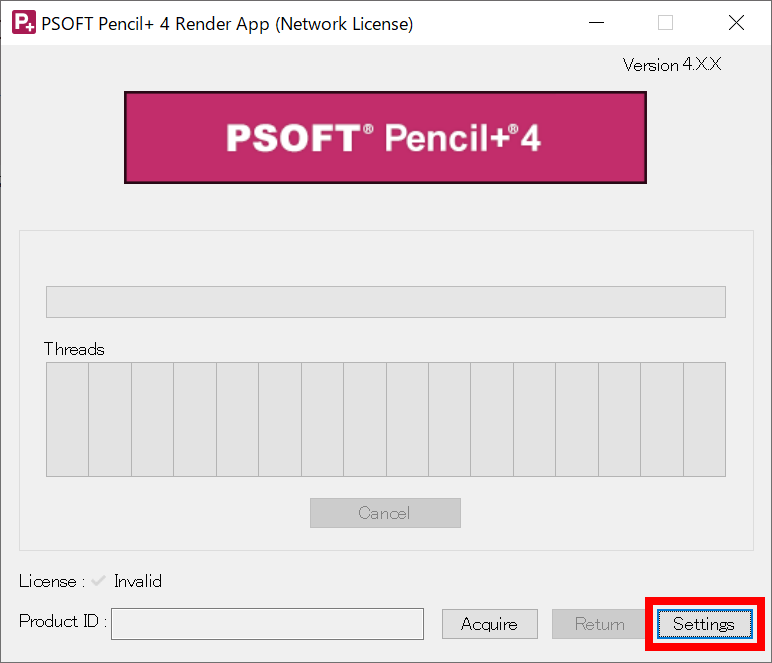
- For 3ds Max and Maya
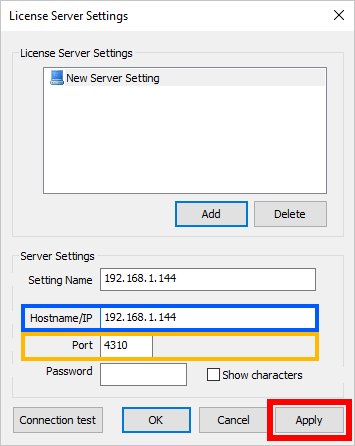
- Click the [Edit] button in the [NL Setting Tool] dialog.
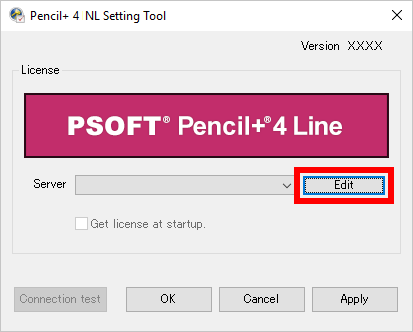
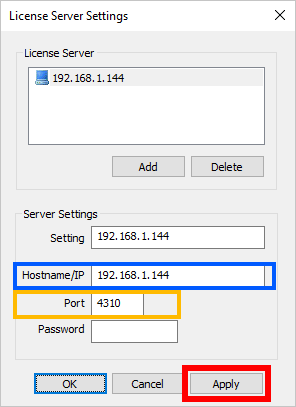
- Enter the "PC name" or "IP address" of the PC where PSOFT Network License Manager is running in [Host name/IP] in the [License Server Settings] dialog.
- Enter the same [Port No.] set in PSOFT Network License Manager for [Port].
- Click the [Apply] button to apply the settings.
- License Server Settings screen
- PSOFT Network License Manager settings screen
- License Server Settings screen
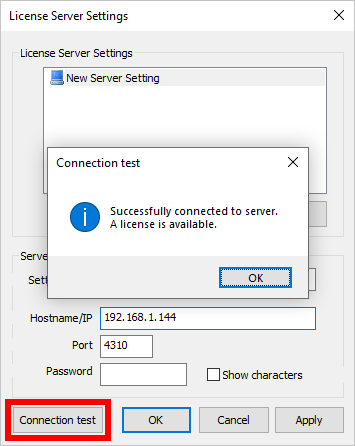
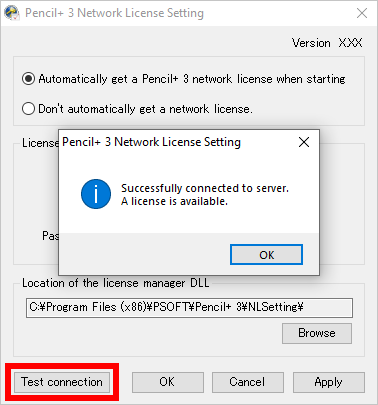
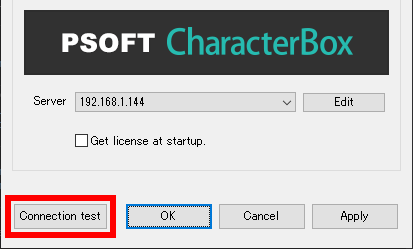
- Click the [Connection test] button. If a dialog saying "Successfully connected to server. A license is available." is displayed, you can use a license.
Client PC settings (for Pencil+ 3 and Liquid+)
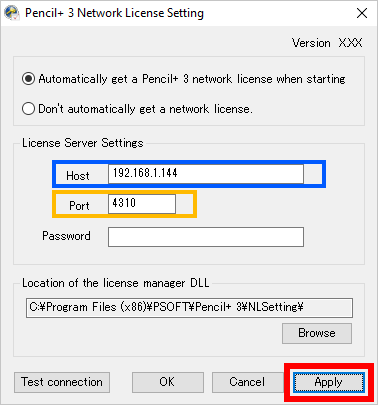
- Launch [Pencil+ NLSetting.exe] and enter the "PC name" or "IP address" of the PC where PSOFT Network License Manager is running for [Host].
- Enter the same [Port No.] set in PSOFT Network License Manager for [Port].
- Click the [Apply] button to apply the settings.
- Network License Setting screen
- PSOFT Network License Manager settings screen
- Network License Setting screen
- Click the [Connection test] button. If a dialog saying "Successfully connected to server. A license is available." is displayed, you can use a license.
Client PC settings (for AE products)
Applicable products: anti-aliasing, CelFX, CelMX, ComicStyle.
- Click "Options" in the Effect Control Panel to open the "Options" dialog.
- Click the [Settings] button to open the "License Server Settings" dialog.
- Click the [Add] button to open the "Host Name/IP" dialog. Enter the "PC name" or "IP address" of the PC where PSOFT Network License Manager is running and click OK.
- Enter the same [Port No.] set in PSOFT Network License Manager for [Port]. Click the [Apply] button to apply the settings.
- License Server Settings screen
- PSOFT Network License Manager settings screen
- License Server Settings screen
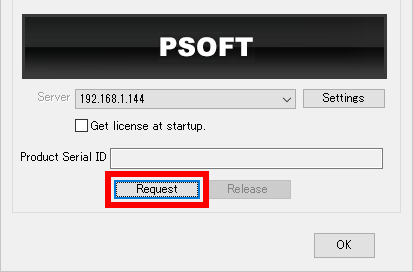
- Click the [Request] button in the "Options" dialog to obtain a license.
If the license acquisition is successful, the acquired Product Serial ID will be displayed.
Client PC settings (for Modo products)
- Click [CBOX] > [License] in the Modo menu bar to open the [PSOFT CharacterBox Network License] dialog.
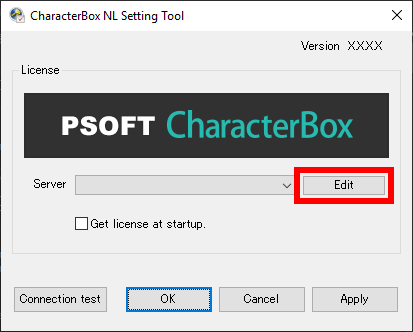
- Click the [Network Settings] button to launch "NL Setting Tool".
- Click the [Edit] button to open the "License Server Settings" dialog.
- Click the [Add] button and enter the "PC name" or "IP address" of the PC where PSOFT Network License Manager is running for [Hostname/IP].
- Enter the same [Port No.] set in PSOFT Network License Manager for [Port]. Click the [Apply] button to apply the settings.
- License Server Settings screen
- PSOFT Network License Manager settings screen
- License Server Settings screen
- Click the [Connection test] button. If a dialog saying "Successfully connected to server. A license is available." is displayed, you can use a license.
3. Troubleshooting
"Network connection timed out. Please check the hostname, port number, or firewall." Error code 100 or Error code 513 is displayed.
- Make sure that the [Server status] of PSOFT Network License Manager is [Running].
- Check that the hostname and port number are correct.
- Make sure that the program and port are allowed by the firewall of the OS or security software on the server PC.
- It is possible that the specified port is being used by other software. Try changing the port number slightly and running the [Connection test] again.
"Connected to the server, but timed out while waiting for a message." Error code 103 or Error code 517 is displayed.
- Make sure that the port and programs you are using are allowed in the firewall settings of the OS or security software on both the server and client PCs.
- If the connection does not work well even if the hostname, port number, and firewall settings are fine, check that the specified port is not being used by another software in the [Inbound Rules] of the [Windows Defender Firewall with Advanced Security] screen. Also, check that a [Block Connection] entry has not been added for PSOFT Network License Manager (psoft_nlsvc.exe).
Pencil+ NLSetting settings are not reflected.
Applicable products: Pencil+ 3, Liquid+.
There may be a difference in privilege level when running 3ds Max and Pencil+ NLSetting. Please run 3ds Max and Pencil+ NLSetting at the same privilege level.
- Right-click on the installed [Pencil+ NLSetting.exe] and click [Properties] from the OS context menu.
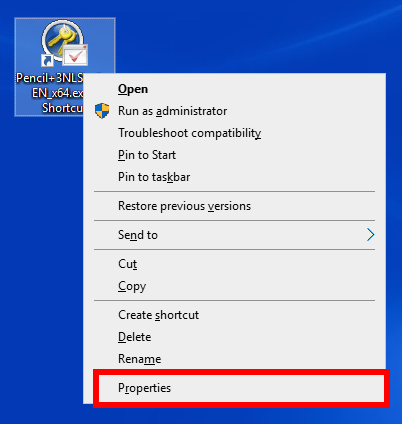
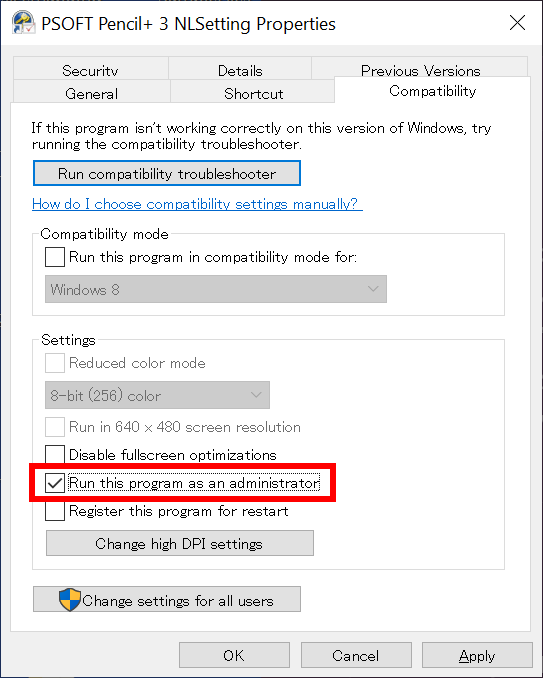
- Click the [Compatibility] tab in the [Properties] dialog.
- If [Run this program as an administrator] is not checked, please check it and edit the network license settings.
Last updated 2023/04/03 Article Link
