We introduce the creation of textures using Pencil+ 2 Material's [Advanced Settings] / [Highlight Design]. We shall create a star-shaped highlight.
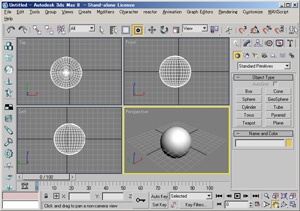 Create a sphere primitive so that it is easy to observe the highlight design effect.
Go to the [Create] panel and press the [Geometry] button, then select [Standard Primitives]. Finally press the [Sphere] button in the [Object Type] rollout. Create a Pencil+ 2 material and configure a simple highlight.
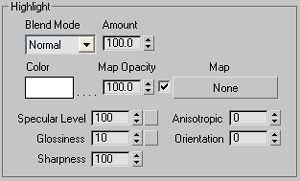
Create the highlight by adjusting the values of [Specular Level], [Glossiness] and [Sharpness] in [Basic Parameters] rollout / [Highlight].
We now completed the basic preparation and can start working on the creation of the actual texture.
*See the tutorial "Using Pencil+ 2 Materials" for an introduction to the creation of materials.
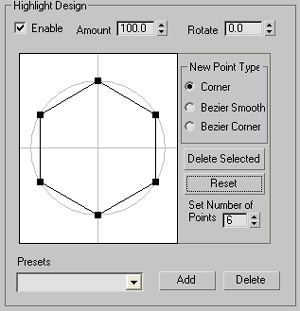
 Go to [Pencil+ 2 Material] / [Basic Parameters] rollout / [Advanced Settings] / [Highlight Design] and check the [Enable] check box.
 Increase the number of summits in order to be able to create a star shape.
Input 10 in [Set Number of Points] and press the [Reset] button. Move the summits into the shape of a star.
The highlight will take the shape of a star when rendering. Emphasize the star shape.
Set the value of [Amount] to 300 to emphasize the highlight's shape.
 Create a Pencil+ 2 material and configure a simple highlight.
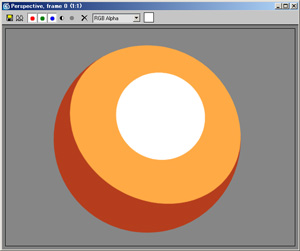
 Go to [Pencil+ 2 Material] / [Basic Parameters] rollout / [Advanced Settings] / [Highlight Design] and check the [Enable] check box.
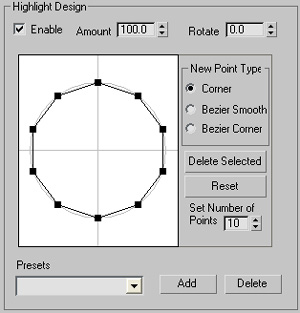 Increase the number of summits in order to be able to create a star shape.
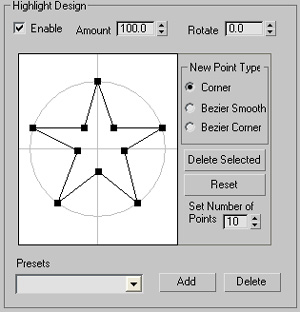 Move the summits into the shape of a star.
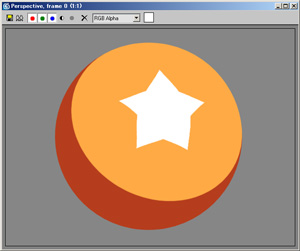
 Emphasize the star shape.
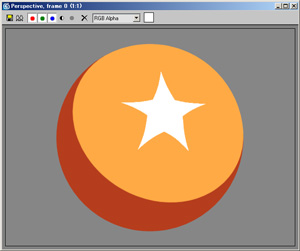
Tips!
Define simple shapes using [Highlight Design] to obtain more effective results. Similarly, simpler model shapes will result in effects that are more clearly visible.
